DIY Interchangeable Arched Display Wall
You know those adorable arched walls everyone rents for their parties now days? Well, I wanted in. Except I wanted to make my own using just one 4x8 sheet of plywood and make it so that we could reuse it for all my friend’s and family’s events.
But you know what? The internet is oddly secretive about how to build these. (I assume because people make big money off of these.) But I’m gonna blow the cover for everyone. I figured it out so you don’t have to.
The checklist:
Arched backdrop
Shelves
Removeable base
Repaintable
A space at the top for vinyl stickers to be attached
First I crosscut 4 4-inch pieces across the 4ft side of the plywood sheet. These will serve as the shelves for the wall.
Next, I cut the arch. There’s a lot of ways you can cut an arch, but I am most comfortable using my router. To get the perfect arch, I used my Milescraft Circle Jig attached to my router.

To attach the shelves to the wall, I drilled some pocket holes using the Kreg Pocket Hole Jig and attached them with some wood glue and pocket hole screws. I used a level and scrap piece of wood as a spacer between each shelf to make sure they were evenly spaced.

The hard part for me was figuring out how to get this piece to stand sturdy but could easily be broken down so the whole display could be stored away. I consulted with my friend @goldbeamcreations because she had recently built herself a similar display wall to feature her items at markets. She said that a half circle shape with a half lap joint did just the trick!
Now I was weary to do this because, to be frank, I am not confident in myself executing half lap joinery. It’s mathy and it relies on a tight fit. But I put on my big girl pants and tried it anyways! (And guess what? It wasn’t THAT hard)
What’s a half lap joint? I included a picture below. It’s basically when two pieces interlock crosswise. There’s a lot of ways to do a half lap joint. There’s fancy traditional ways. But I just did mine using a jig saw.

First, I created my half circles the same way I made my arch. I cut them out using the Milescraft circle jig and a router. I glued two half circles together to make them thicker and sturdier. Once those were cut, it was time to cut my half lap joints.
I’m not going to explain in depth how I did the half lap. Honestly, because it was my first time and I kinda figured it out as I went. Basically, what I did was take the thickness and half the height of the half circle and transferred it onto the wall. Then take the thickness of the wall and that same height and transfer it on the half circle. I cut out those notches with my jigsaw and then interlocked them together. I am not permanently attaching these together so that they can slide apart and be stored away.

Now that everything is built, I painted it to my theme. The first time the wall was used, the theme was “pastel rainbow”. I painted each shelf a different pastel color. I designed a quote on Procreate and then cut out that design on permanent vinyl using my Cricut Explore Air 2. I applied that vinyl to the top of the display wall and that was it!

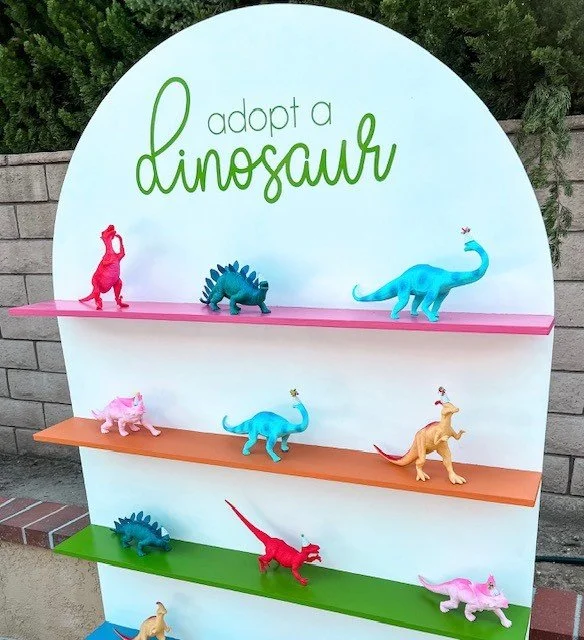
The best part of this display wall is that it can be changed to match any event! It was first used for a pastel rainbow theme and intended to hold desserts. But by the next party, it needed a new theme. Dinosaurs!
No problem! I just painted the shelves a different color, removed the old vinyl sticker and attached a new vinyl sticker I customized on Procreate.


This time, I traded in desserts for a “adopt a dinosaur” display. I put these tiny party hats on these dinosaur figures from the dollar section at Target. (This was hilarious and so enjoyable to do. hahaha!). And Voila! A whole new themed display wall.